Librarians Help – With Math!

Today I had my Colors and Codes program that I mentioned last week.

Now, I spent ten years of my life teaching college math, but doing math programs at the library is so much more fun!

Why? Well, the biggie is I don’t have to grade them, so it makes the whole thing much more light-hearted. I’m showing them things about math that I think are really cool, and they get to think about ways to do it themselves. And it’s all just for fun. At the library, we teach people things they want to know! If they don’t want to know them, they don’t need to come. It’s that simple!

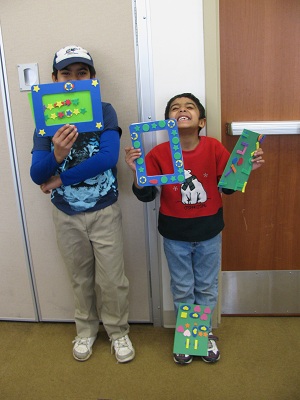
Here’s what I did. I showed the kids my prime factorization sweater (wore it of course), and we worked out how it works. (That was fun!) I told them if colors can represent numbers, they can also represent letters. Just use 1 to 26 for A to Z. So you can write messages this way. I showed them a prime factorization code, then showed them other bases and how you can make codes with them. We wrapped it up by getting out sticky foam shapes and they could put a coded message or just a pretty pattern around a picture frame or on a bookmark or a door hanger.

The highlight for me, I think, was when a girl was working on coloring in the prime factorization chart on the hand-out. She was stuck on 24. I asked her what it equaled, and she said 12 x 2. So we looked at 12, and then the light went on and we talked about how you could do figure it out different ways, but you always got three 2s and one 3.

Now, I’m going to write some notes to myself while the program’s fresh in my mind. It went well; the kids had fun. But I want to do it again this summer, and hope it will go even better.

1. I’ll set the age level higher. I do think I lost a few kids this time. I think I’ll set it at 10 or 11 years old rather than 8. You want the kids to be fully comfortable with multiplying. Now that I think about it, when I did this program a few years ago at Herndon Fortnightly Library, I think the age limit was 10.

2. We’ll do some coloring on the prime factorization chart before I move on. This group did work out with me how it works. I didn’t want to get bogged down, but I think some coloring would help them understand it better.

3. I’ll have them figure out the numbers for their name in every code I go over. For example, my name, Sondy, in a base 10 code is 1915140425. (S is the 19th letter, O is the 15th, and so on.) In a prime factorization code, it’s 19 1 3 5 1 2 7 1 2 2 1 5 5 1. (19 x 1, 3 x 5 x 1, 2 x 7 x 1, 2 x 2 x 1, 5 x 5 x 1) In a Base 6 code, it’s 3123220441. In a Base 5 code, it’s 34 30 24 4 100. In Binary, it’s 10011 1111 1110 100 11001. Taking the time to do that would mean they’d get what I was having them do when they went to use the foam sticky pieces.

4. We’d do some coloring on the other charts before we moved to the foam shapes. Then I’d have them do their name with the colors they picked.

5. I’d show them exactly how I did my name on the bookmarks, one using colors and one using shapes.

Did I mention everyone did have a good time? But I think I’ll do a little more hands-on, using their names, before I move to the craft next time.

But it was a great trial run!

And don’t forget! Librarians help! We get to show kids how much FUN Math is! And we don’t even have to test them on it!
Colors and Codes

I just got a tweet that made me prouder than I’ve EVER been of my Prime Factorization Sweater, and that’s saying a lot.

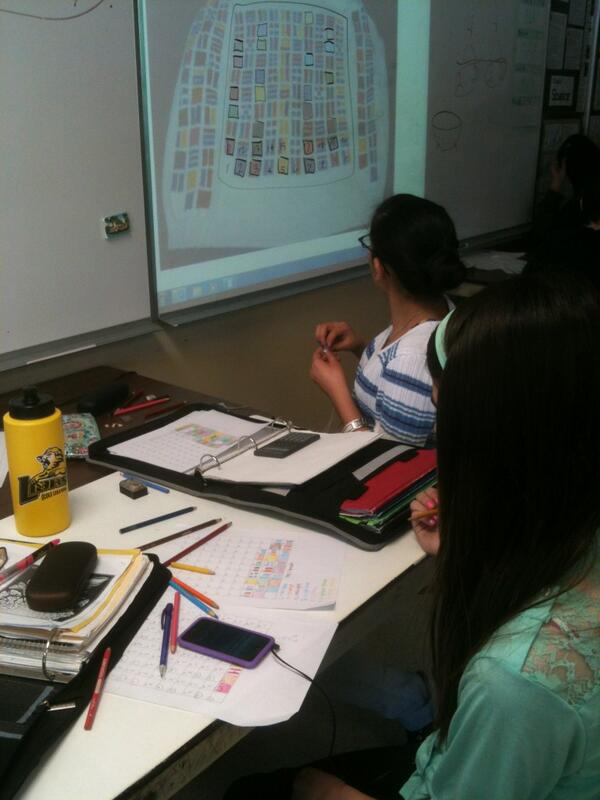
The tweet was from @milesmac, Miles MacFarlane, a teacher, with the words, “#LeilaN students deciphered @Sonderbooks Prime Factorization Sweater – Now making own code #7Oaks”

Here’s the picture that accompanied it. Even by the backs of their heads, you can tell those are engaged kids!

Yes! That’s what it’s about! Mr. MacFarlane, you made my day!

And the timing is lovely. Next week, at my own City of Fairfax Regional Library, I’m doing a program I’m calling “Colors and Codes” where we’re going to do exactly that. I’ll wear the sweater (or maybe my prime factorization t-shirt and bring the sweater. And the scarf). I’ll show them how we can assign each letter of the alphabet a number from 1 to 26. We’ll start with a factorization code, but move on to things like Base 6 or Binary. And I’m going to have foam shapes for them to make crafts with codes in colors or shapes.

Yay! See, we don’t have to make Math fun! Math is fun!

Prime Factorization Progress – To 39

I’ve already posted several times about my Prime Factorization Knitting, and I can’t resist posting pictures every time I get another row of numbers done on my new niece’s Prime Factorization Blanket.

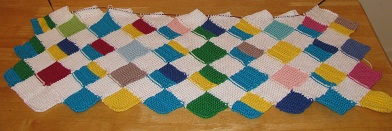
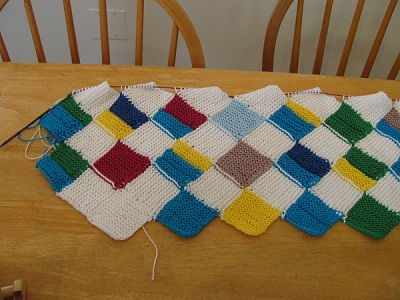
You can get more detail of how it works in the earlier posts, but basically each prime number gets a color, and each number gets a square divided into the colors for the factors of that number. I’ve finished up to 39. (I’m not putting an exclamation mark after that statement, since I haven’t gotten to 39 factorial.) Here’s how the blanket looks so far:

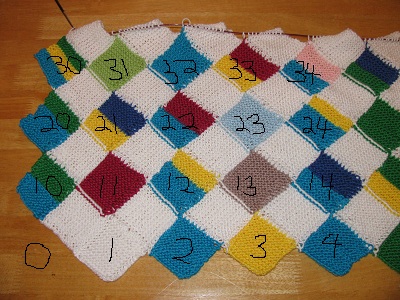
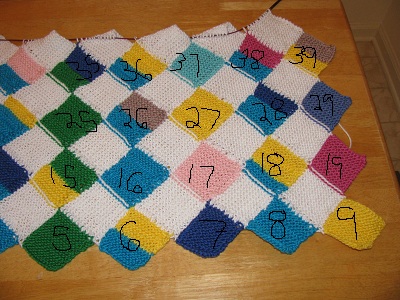
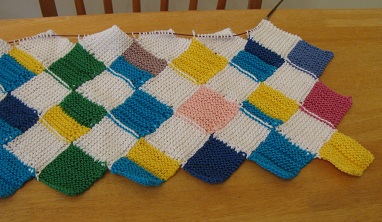
And here’s a close-up on each side, with the numbers written in. You’ll have to figure out the factors. And I can assure you that it’s a lot easier to tell when there are two or three (or four or five) of the same factors in one number when you can see and feel the blanket. I divided it with garter ridges, and the photo couldn’t really catch that.

Here’s the left half:

And the right half:

Don’t forget that you can get your very own Prime Factorization T-shirt at my Cafe Press shop for a lot less effort than this blanket is taking (but okay, you won’t have as much fun as I’m having). I took it to a Youth Services Librarian meeting today, and only the unwary asked what it was going to be. I must admit, it’s a lot better for knitting during meetings when I’m on one of the white rows.

Will I finish before Baby’s arrival in May? I hope I will at least be close….

Prime Factorization Blanket – to 29

I got done another row of numbers on the Prime Factorization Blanket for my arriving niece!

It’s hard to see the ridges in the solid colors, so here are close-ups of the left half, then right half:

The bottom row in the picture is 1 (white), 2 (blue), 3 (yellow), 4 = 2 x 2, 5 (green).

The second row is 10 = 2 x 5, 11 (red), 12 = 2 x 2 x 3, 13 (tan), 14 = 2 x 7, 15 = 3 x 5.

The top row is 20 = 2 x 2 x 5, 21 = 3 x 7, 22 = 2 x 11, 23 (baby blue), 24 = 2 x 2 x 2 x 3, 25 = 5 x 5.

Now the right half:

Here we have the bottom row of 5 (green), 6 = 2 x 3, 7 (dark purple), 8 = 2 x 2 x 2, 9 = 3 x 3

The second row is 15 = 3 x 5, 16 = 2 x 2 x 2 x 2, 17 (pink), 18 = 2 x 3 x 3, 19 (dark pink).

The third row is 25 = 5 x 5, 26 = 2 x 13, 27 = 3 x 3 x 3, 28 = 2 x 2 x 7, 29 (periwinkle)

I really like the way it’s turning out!

You can read more about my prime factorization knitting in previous blog posts or via my Pinterest board. And don’t forget to look in my cafe press shop for prime factorization t-shirts.

My posts on Mathematical Knitting and related topics are now gathered at Sonderknitting.

Prime Factorization Blanket – Second Row

I’ve finished the second row of numbers (third row of rectangles) in my Prime Factorization Blanket!

The fun part was that my brother and his wife found out on the 17th of December that their baby is a girl. So, since I was coming up on the prime number 17, I chose to use pastel pink to represent 17. For good measure, I used a pretty rose pink to represent 19.

I only hope that having all that turquoise blue won’t make people think it’s a blanket for a boy, but I’m hoping it’s multicolored enough, it won’t give that idea.

I couldn’t manage to write in all the numbers on the picture, like I did after the first row, but in real life I assure you, you can tell when there are two factors of the same prime.

So here’s how you read the blanket:

The bottom row starts with a blank space for 0.

1 is the same as the background color, since 1 is a factor of every number.

2 is turquoise blue.

3 is yellow.

4 = 2 x 2, so two sections of turquoise.

5 is green.

6 = 2 x 3, so a section of turquoise and a section of yellow.

7 is purple.

8 = 2 x 2 x 2, so three sections of turquoise.

9 = 3 x 3, so two sections of yellow.

Then I did a row of white rectangles (diamonds). Second row of color:

11 is red.

12 = 2 x 2 x 3, so two sections of turquoise and one of yellow.

13 is brown.

14 = 2 x 7, so a section of turquoise and a section of purple.

15 = 3 x 5, so a section of yellow and a section of green.

16 = 2 x 2 x 2 x 2, so four sections of turquoise.

17 is Pink!

18 = 2 x 3 x 3, so a section of turquoise and two sections of yellow.

19 is rose pink.

Next I’ll do a row of white rectangles, then start the next row with 20. The primes in that row will be 23 and 29, so I’ll have to bring in two new colors.

The color sections will show up better after I’ve knitted the white rectangles, but I was impatient to show what I’ve done!

I’m very pleased with how this is turning out. I may have to make myself a Pascal’s Triangle Shawl when I’m done….

My posts on Mathematical Knitting and related topics are now gathered at Sonderknitting.

Bedtime Math!

I’m so excited! Today, thanks to a note in the ALSC (Association for Library Service to Children) newsletter, I found out about Bedtime Math.

Why do I think Bedtime Math is so awesome? Because that’s totally what I did with my younger son.

My first Master’s degree was in Math, and I was a college math instructor for ten years. College students in general ed math classes are generally not excited about math. So when we started doing math problems with my excited son at bedtime — I’m not sure how it started — my son quickly learned those magic words I absolutely COULD NOT resist — “Just one more math problem, Mommy, please!” He could extend bedtime forever with those magic words.

I don’t remember how it got started, but I do know that we were in the thick of this when he was 5 years old. His brother turned 12 years old in March. I turned 36 in June. Sometime in there, I told him that when he turned 6, then his age plus his age would equal his brother’s age. But, even better, his age TIMES his age would equal my age. His next question was pretty natural, “What’s TIMES?”

One week later, his brother asked him a problem I never would have tried: “What’s 16 times 4?” Timmy (the 5-year-old) figured it out *in his head.* Without knowing times tables. So that was the context of “One more math problem, Mommy, please.” I’d give him progressively harder addition problems — and then it got to be progressively harder multiplication problems. All done in his head, at bedtime. For fun.

Of course, it all starts with counting. I remember with my older son, just counting as high as he could go in the car while running errands. It’s fun when they really realize how it works and that they could go on and on forever. He was also the one who kept making up words for “numbers bigger than infinity.” I couldn’t quite convince him that didn’t work.

(Now my younger son, a Freshman at the College of William & Mary, recently spent his free time devising an algorithm to choose a completely random book from all the volumes in the campus library. That’s my boy!)

In my current job as a librarian, I was thinking about all the counting and math we did when my kids were small. And then thinking about the Every Child Ready to Read workshops, where we encourage parents to read, talk, write, sing, and play with their kids. I’m going to do the workshop “Fun With Science and Math for Parents and Children” — only I think I’m going to take out the Science and just focus on Math.

See, the thing is, I don’t believe for a second you have to “make” Math fun. I think math *IS* fun, and children naturally think so, too. Can I communicate that to parents?

I’m also planning to do a program with older kids about using math to make coded messages with colors or shapes. It uses ideas from my Prime Factorization Sweater and my Coded Blessing Blanket. I did the program a few years ago, a little afraid I’d lose the kids, and they totally loved it.

All this is to say: Bedtime Math! YES! I can present this as an idea for parents who need help thinking of problems to talk about with their kids, who might not think them up as easily as I did. (I also taught my kids the chain rule in calculus because I wanted to teach it to someone who would get it right. But I don’t think I’ll recommend that to parents.)

I still say, as a librarian, part of my job is the FUN side of learning. At libraries, we help people find information to teach themselves. But in the children’s department, a huge part of our job is helping parents make learning a natural and fun part of their family life. We don’t have to test them! We don’t have to follow the book or the curriculum! We can show them ways to think about the concepts that are just plain fun!

I’m going to be looking for more articles about early learning of mathematics. I think it can fit in nicely with Early Literacy Skills that we emphasize so much. But mostly I’m jazzed. Other Moms are going to hear those magic words: “Just one more math problem, Mommy, please!”

Prime Factorization Blanket – First Row

So, Tuesday I posted my plan for making a Prime Factorization Blanket for my new niece or nephew. I then learned that my brother and his wife may know the baby’s gender by December 17th. Did I want to wait that long to choose the colors and start?

Short answer: No. I got to thinking: It’s not like this won’t be a very multi-colored blanket. I had thought about using shades of blue or shades of pink at the beginning, but I don’t think that’s a good plan. Since the colors represent numbers, and since a baby’s going to see this, better to have distinct colors with distinct names as the prime factors that show up most often.

On top of that, I happen to have a full skein and more of a turquoise blue left over from another project. Turquoise worked out very well as the color for 2 in my prime factorization scarf. It doesn’t cry out “boy,” but neither is it a bad color for a girl. And best of all, it goes well with pretty much every other color. (And 2 has to do that.) I decided to go with bright, rich colors for the primes that will be most predominant.

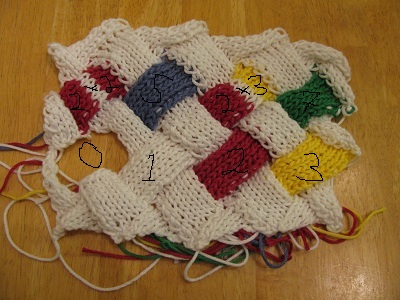
Thanks to a fairly long management meeting and a day off today where I needed to read, I’ve already finished the first row. I’m very happy with the colors! Now, the first row consists of just knitting 9 squares. The next row of white will convert them into diamonds. I’m also proud to say that I sewed in the starting ends of all the yarn. And that’s my plan to go on with: At the end of each row, I’ll sew in all the ends that were loose at the start of that row. (I don’t want to sew in the ends right next to a live stitch.) That way, it won’t be a daunting task at the end of the blanket.

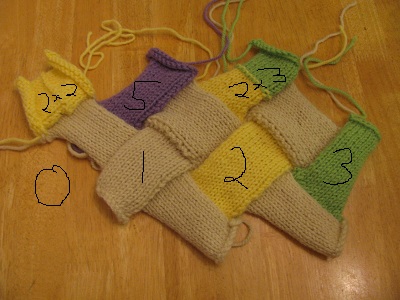
So here’s the first row, the numbers 1 through 9 (0 is a blank space.), with the numbers the colors represent written on the picture:

I admit it’s getting where I’m going to have a hard time giving this away! Good thing I’ve publicly said it’s for my new niece or nephew!

And that does remind me. If you’d like your own Prime Factorization T-shirt or Tote Bag, or if you have a friend or loved one who really needs one for Christmas, be sure to check my Cafe Press Prime Factorization Store! 🙂

My posts on Mathematical Knitting and related topics are now gathered at Sonderknitting.

Swatching a Prime Factorization Blanket!

I’m excited! My little brother Robert’s wife is having a baby. Since Robert is even more mathematically minded than I am, if that’s possible, I definitely think his baby needs a prime factorization blanket. I had to laugh, though, because when I told him this instead of expressing gratitude, he said, “Okay, but we’ll have to talk about the representation of 0 and 1.” I remembered that a long time ago when I showed him my prime factorization sweater, he told me that he thought the rows should start with 0, 10, 20, and so on.

Now, I don’t want to include 0. Primes and composite numbers are properties of the natural numbers. But then I had a brilliant idea: Why not leave a hole for zero? Now to figure out how to work that in.

Mind you, I wasn’t prepared to make another grid like my original sweater. I wanted to do something different, and I didn’t want to have to have several colors dangling as I knitted each row. I also didn’t want to use stripes like my prime factorization scarf or the prime factorization cardigan I’m working on. To make a wide enough blanket, that would take far too much yarn. That’s what gave me the idea of using entrelac, that and a brand new book I’d had sitting in my house for a few months called Entrée to Entrelac, by Gwen Bortner.

I ended up making three swatches. Now, there are things I don’t like about all three swatches, but I think I learned enough to decide how to make the blanket. The only decision left is what colors to use. I don’t think they know the gender yet, so I probably won’t use blue or pink for 2 or 3. (Though maybe if I used blue for 2 and pink for 3 it would work for either gender — but I’ll probably go with yellow and green if they don’t know in the next few days.)

I planned to use Cotton Classic, the same yarn I used for my original sweater, because I can use the leftover colors from that sweater for a lot of the larger value factors, so I won’t have to buy that much additional yarn. On yarn.com they had a sale on Cotton Classic, but no off-white, so I’ll go with a white background, which is nice for a baby blanket (though it won’t stay clean — but that’s their problem, teehee). Of course, that’s what I thought, but the total (for some additional colors) was a lot more than I’d usually spend on a baby gift, but I’m going to have so much fun with it, it’s totally worth it.

I decided the easiest way to break a block into factors would be to have 12 stitches and 24 rows. (Entrelac normally has twice as many rows as stitches.) This would divide naturally for 2, 3, 4, or 6 factors, and I can work something out for 5 factors.

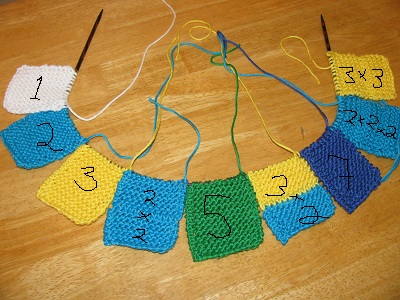
The first swatch I made half that size because I didn’t want to do an enormous swatch. I made it base 4. I used white triangles on the outside and a hole for zero. Before I even show the swatch, I’ll say the things I didn’t like:

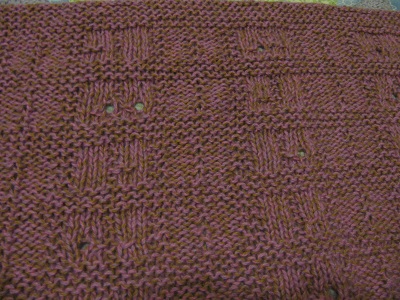
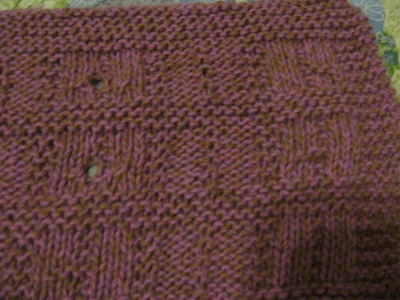
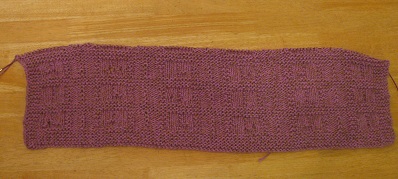
The hole didn’t work out very well. It wasn’t going to be very stable. I didn’t like the way the border triangles came out, and I didn’t like using white in between factors — too many yarn ends. It all curled way too much. The colors didn’t make me happy, and I knew I wasn’t happy with it. Here’s that first try:

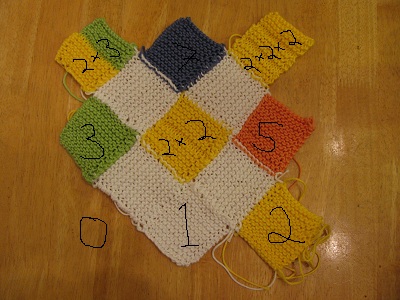
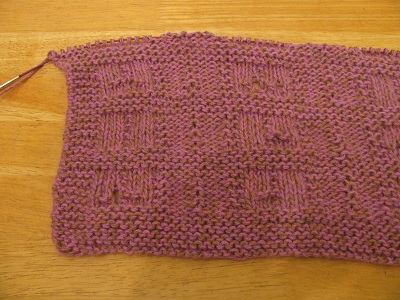
Okay, I decided to get rid of the triangles and just use white rectangles on the outside and just leave one corner missing for zero. I also decided to make the swatch full size with 24 rows, not 12 like the previous. And I decided to try the wool/acrylic blend I used for my prime factorization scarf. Here’s how the second swatch came out:

What I did like about this swatch was using a ridge instead of a band of white between factors. Much easier and will involve less ends to sew in. The yarn was softer, but it would make a much bigger blanket, and I thought I’d rather use the cotton after all. I decided the outside white rectangles were completely unnecessary. The biggest thing I didn’t like was that the edges were curling way too much.

So the kind of obvious solution for curling edges? Use garter stitch instead of stockinette. A bonus is that then it will be easy to count ridges to divide up a block. I’m very happy with everything in the last swatch (this time base 3) except the particular choice of colors. (I hate that orange! And the green shade didn’t turn out very lovable.) Instead of a ridge where there are factors, I’ve got the lack of a ridge. I think this might work!

I should mention that the actual blanket will be rows of 10, but I wanted to work out the overall scheme with less.

The most lovely thing about doing the blanket in entrelac instead of intarsia, like I did the original sweater, is that I can knit one number at a time, and I can do it in order! So I don’t even have to plan it all out ahead of time, I can just jump in and knit! So — I will be knitting the rectangle for 1, and once I finish that, I will have to make a decision about the color to use for 2. Will I find out the baby’s gender before I begin? Either way, it’s going to be a unique and beautiful blanket, if I do say so myself.

My posts on Mathematical Knitting and related topics are now gathered at Sonderknitting.

Mathematical Knitting — Blessing Blanket

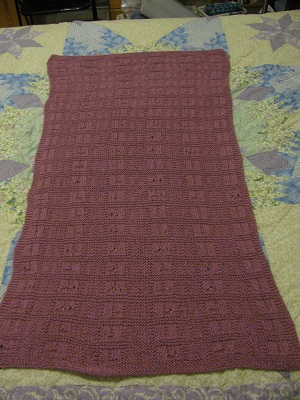
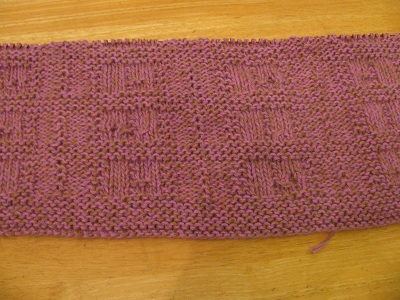
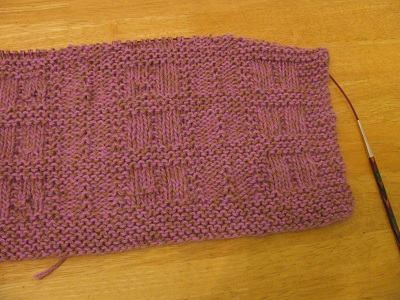
Alyssa Karise is here! And her blanket is ready to send! Here’s the finished blanket. It’s actually a rectangle, but I wanted the message to be in the picture, reading from the top to bottom, left to right, so the perspective warps it a little.

I used Base 5 math to code a message into the blanket, which I explained when I started. But now I can show you how it worked out.

You can see in the picture above that the blanket makes a sort of grid. The “smooth” squares in the blanket were knitted on the back side with the stitches P3, K1, P3 (purl 3, knit 1, purl 3). There are six of these squares in each row of the grid. I knitted my code on the back side so that the words would go from left to right. I coded letters into each square this way: P1, next two stitches are first digit of letter, K1, next two stitches are second digit of letter, P1.

I used two stitches for each digit of the letter, using a Base 5 code. I used P2 for 0 (since I was on the purl side); K2 for 1; yarn over, knit 2 together (ykt) for 2; ssk, yarn over (sky) for 3; and purl cable one stitch, holding to the back (cb) for 4. Here’s how the letters were made:

A: 01: p2 k2;
B: 02: p2 ykt;
C: 03: p2 sky;
D: 04: p2 cb;
E: 10: k2 p2;
F: 11: k2 k2;
G: 12: k2 ykt;
H: 13: k2 sky;
I: 14: k2 cb;
J: 20: ykt p2;
K: 21: ykt k2;
L: 22: ykt ykt;
M: 23: ykt sky;
N: 24: ykt cb;
O: 30: sky p2;
P: 31: sky k2;
Q: 32: sky ykt;
R: 33: sky sky;
S: 34: sky cb;
T: 40: cb p2;
U: 41: cb k2;
V: 42 – cb ykt;
W: 43: ykt cb;
X: 44: cb cb;
Y: 100: k2 p2 p2; (I knitted this as k2p1 (k1) p3, leaving the garter stitch in the middle.)
Z: 101: k2 p2 k2.

Here’s what I planned to have the blanket say (I added Alyssa’s name at the end when it was clear what that would be. Fortunately, I was knitting from bottom to top.):

Alyssa Karise,
Grace and Peace.
Grace and peace to you from God our Father and the Lord Jesus Christ.
Grace and Peace.

When I had the blanket all finished, ends sewn in, and I laid it out to take pictures — I discovered I’d left out a word! Urgh! But it’s still a Blessing Blanket. And I still thought about and prayed for Alyssa as I knitted. And it’s still warm and soft. I’m not going to say what word I left out, because I want to see if the baby’s parents can “read” it well enough to figure out! (I’m bad!) Astute readers of this blog who possess really really good eyesight might be able to tell as well.

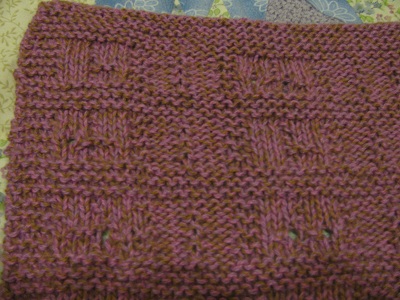
To see how the coding actually looks, I took pictures of the top three rows. Here is AL – KA – GR:

Since the stitches are done on the purl side, k2 gives you straight bumps. So A = p2 k2 gives you a smooth panel, then bumps. L = ykt ykt gives you a hole from the yarnover, then two stitches together, in both sides. On the second row, K = ykt k2 combines both of those. Then we have A, which looks just like the first A. The third row has the same combination reversed in G = k2 ykt. Then R = sky sky. With sky, the stitches are knitted together before the yarn over, so the hole is on the right of the combined stitches.

The next section shows YS – RI – AC, and a fourth row, ND:

Y = k2 p2 p2, so I started on that first stitch I usually leave a purl stitch. So it looks the same as A, only shifted over one stitch to the left. S = sky cb shows us our final “digit”. The cable in back comes out as one stitch going over another with no hole. The second row is easier to see. R = sky sky, so you can see both sides have the hole on the right. Then I = k2 cb, and you can more easily see the cabled stitch crossing over. On the third row, we have A = p2 k2 and C = p2 sky. The fourth row, the end of the word AND, gives you a nice look at the cables again, with N = ykt cb and D = p2 cb.

I’ll give you the end of the top three rows, but I’ll leave it to the reader to work out that at least I didn’t make a mistake on the top of the blanket:

Making this was so much fun! In fact, I’ve been dragging my feet about sending it on. But tonight I noticed that the yarn label happens to have a pattern for a one-skein scarf, and I happen to have one skein left. So perhaps making myself a scarf out of this wonderful 85% cotton 15% angora yarn (Serenade) will remind me to send thoughts and prayers and blessings to my sweet little niece, Alyssa Karise.

And, meanwhile, my brother announced that his wife is expecting a baby. His baby needs a prime factorization blanket! I am swatching to figure out how best to accomplish this, and will definitely be letting my readers know!

My posts on Mathematical Knitting and related topics are now gathered at Sonderknitting.

More Mathematical Knitting

I’m a math nut. I’ve always said that my prime factorization sweater proves it.

I finished knitting the sweater in 2005. It shows the color-coded prime factorization of all the whole numbers from 2 to 100. I’ve shown it to lots of people since then, with mixed amounts of appreciation. In 2009, I finally posted a blog explanation of it and how it works.

Last April, I wore it to the US Science and Engineering Festival. I showed it to Ivars Peterson, manning the Mathematical Association of America booth. He tweeted one tweet with a link to my blog post, and the next day I got 28,000 hits on my website.

And the post got so much attention, this month it’s appearing in Hacker News! In print! I’m happy that people are finding out about it. It’s just goes to show that Math is Beautiful.

Now, there’s no way I’m ever going to make a replica of the original sweater. It took way too long. But since then, I’ve designed a t-shirt for sale to all on Cafepress. I’ve knitted a scarf that uses color-coded stripes to represent the prime factorization of numbers up to 50. And I’ve begun work on a cuff-to-cuff cardigan that also uses color-coded stripes, similar to the scarf. I hope it will go up to 100.

But for now I’m taking a break from knitting the prime factorization cardigan, because my little sister is having a baby!

I wanted to knit something special for the little one, but not so blatantly mathematical. I decided to use a mathematical code to knit a blessing into the blanket.

Here’s how it works. I’m using the same pattern I used to knit my son a cotton blanket 18 years ago. It’s a simple knit-purl pattern. I didn’t want lace, since I wanted it to function as a warm blanket. I gave it to him whenever he ate and managed to get him very attached to it!

I want to knit a code into the blanket. The layout is a basic grid. It mimics a plaid, but with knits and purls. I decided to focus on the stockinette sections that show up on one side. These sections are seven stitches across, with the stitch in the middle purled on every other row. There are six sections across in the grid and a total of 20 sections vertically down the blanket.

The baby is a girl, and her middle name will probably be Karise, coming from the Greek word for grace. I decided to use the Christian blessing that shows up many times in the New Testament: “Grace and peace to you from God our Father and the Lord Jesus Christ.” After all, what more could you want for a baby than grace and peace?

That’s 14 words, so I decided to put one word on each row of the grid, with the words “Grace and Peace” before and after, using all 20 rows. Each word is six letters or less, so I can use the six stockinette sections to highlight the letters.

Now, how to do the letters? Simple! Years ago, I did a library program where I showed the kids that they could use the ideas from the sweater to make codes using colors or shapes for letters. You start with a simple 1 to 26 code for the letters A to Z. Then I will convert the numbers to base 5 and I only need 5 different coded digits.

Here’s how the letters will be represented:

A – 01 B – 02 C – 03 D – 04 E – 10
F – 11 G – 12 H – 13 I – 14 J – 20
K – 21 L – 22 M – 23 N – 24 O – 30
P – 31 Q – 32 R – 33 S – 34 T – 40
U – 41 V – 42 W – 43 X – 44 Y – 100
Z – 101

Then I assign certain stitches to represent each digit. Since knitting is done from right to left, I’m going to work the stitches on the purl side, so when I look at them, they will read left to right.

Here’s the code I’m using, with two stitches for each digit.

0 = purl 2 (p2)
1 = knit 2 (k2)
2 = yarn over, knit 2 together (ykt)
3 = ssk, yarn over (sky)
4 = cable one purl stitch in back (cb)

Since the purl sections I’m using have 3 purl stitches, one knit stitch and then 3 purl stitches, I’m putting in the code this way: one purl stitch, then the first digit of the coded letter,
then one knit stitch, then the second digit of the coded letter, then one purl stitch.
I’m doing this on the middle row of the section of the grid.

I am working the code from the bottom of the blanket, so I had to list all the words in backwards order.

Here’s how it’s working out!

This picture shows the bottom three rows of the large grid. So I encoded the words “Grace and Peace.” Here’s the detail:

Looking at the first two sections of each word, on the top row, we have G = 12 = k2, ykt; R = 33 = sky, sky.
Second row has a blank section to center “AND,” then A = 01 = p2, k2.
Third row has P = 31 = sky, k2; E = 10 = k2, p2.

Here’s the middle section:

For the middle, on the top row, we have A = 01 = p2, k2; C = 03 = p2, sky.
Second row has N = 24 = ykt, cb; D = 04 = p2, cb
Third row has A = 01 = p2, k2; C = 03 = p2, sky

And finally, the last two sections in the row:

This just has the end of each word. On the first and third row, that’s E = 10 = k2, p2. We’ve got “blank” sections in the other slots.

Oh, and I should mention that on yarn.com, I purchased some fabulously soft yarn on sale. It’s Artful Yarns Serenade, and it’s 70% pima cotton, and 30% angora. There’s one strand of pink, one of purple, and one of brown, which I thought more interesting than straight pink. It’s ending up so beautiful and wonderful to touch. I always say that knitting with soft yarn is like therapy. And this time, I get to knit in a mathematical blessing.

My posts on Mathematical Knitting and related topics are now gathered at Sonderknitting.