Hooray! I’ve knitted my Pascal’s Triangle Shawl all the way to the 10th row!

Now, it’s not finished — I’m going up to 15 — but I can’t resist explaining it already. I think it is SO COOL! And even more patterns are going to pop out as I continue.

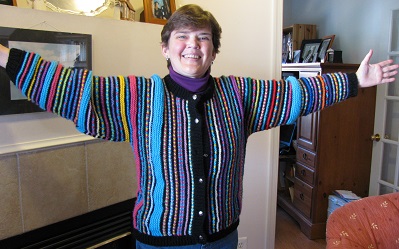
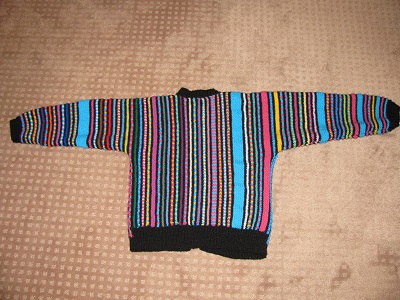
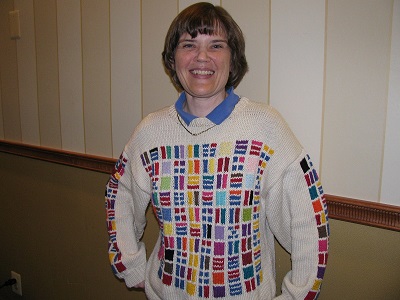
My mathematical knitting began with my Prime Factorization Sweater, done in intarsia, with Tahki’s Cotton Classic yarn. It shows the prime factorization of all the numbers from 2 to 100, using a different color for each prime, with 1, the background color, in white.

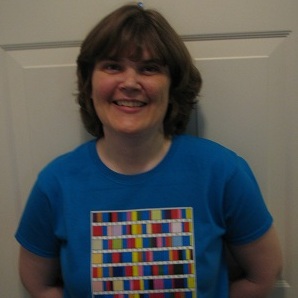
Later when the internet discovered my sweater, I made a Café Press Prime Factorization T-shirt so anyone can have the color-coded prime factorization of the numbers from 2 to 100.

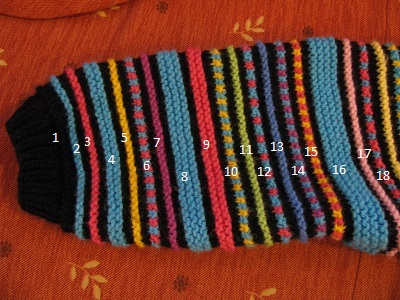
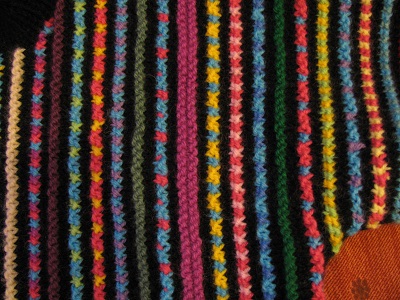
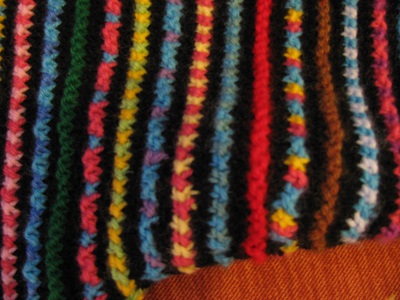
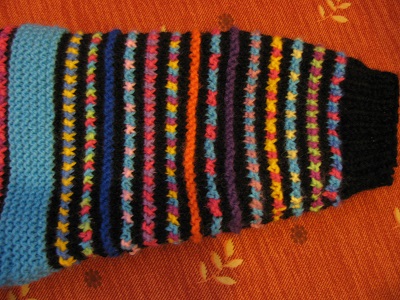
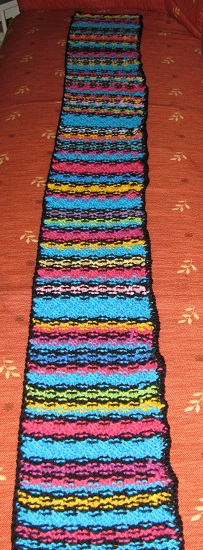
Now, the trouble with intarsia, is you have to carry all the colors you use in any given row along the back of the sweater. And there are about a million ends to sew in at the end. But a couple years ago, I got a hankering to do something like this again, and it occurred to me that if I used stripes, I could deal with one color at a time. I made a reversible Prime Factorization Scarf, where the thickness of the stripes tells you how many times a factor occurs. It also uses a different color for each prime. This time 1 is black, and there is a black stripe between each successive number. Within each number, there is a two-row stripe for each factor. This is done in Plymouth Encore yarn.
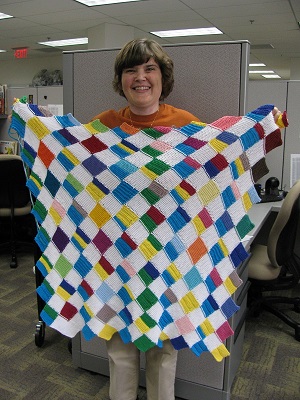
Then my brother, even more mathematically minded than me (if you can believe that!) was going to become a father. His daughter needed a prime factorization blanket! And it occurred to me that it would be far easier to knit the design in Intrelac, using rows of diamonds. I went back to the nice soft Cotton Classic yarn, and white as 1, to be bright for the baby. I used garter rows to show how many factors of each color.

The Prime Factorization Blanket turned out fantastic! But the horrible part was giving it away.
I got to thinking. Intrelac naturally falls into a triangle shape. I instantly thought of something mathematical in the shape of a triangle — Pascal’s Triangle! And I have a special fondness for Pascal’s Triangle, having won a Chalk Talk competition on the Binomial Theorem at a Math Field Day when I was a junior in high school. The numbers in Pascal’s Triangle are the Binomial Coefficients from the Binomial Theorem.
And — here’s where I started getting excited — I knew that there are some fascinating patterns in Pascal’s Triangle. Why not show the prime factorization of each number in the triangle? That would show some of the patterns.
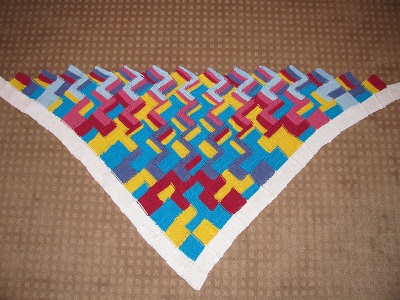
So I began my Pascal’s Triangle Shawl. The first thing I noticed when sketching it out is very cool. Even though the numbers in the middle of the triangle get hugely big quite quickly, they never have any prime factors bigger than the number on the end of the row. So if I take the shawl to row 15, I will only need colors for 1, 2, 3, 5, 7, 11, and 13. To show the prime factorization this way (the same as the blanket), I’ll use 12 x 12 squares, using garter stitch rows to show the factors, with smooth stockinette stitch between factors.
The numbers in Pascal’s Triangle can be calculated two ways. The first way, each number is just the sum of the two numbers above it. Starting with 1.
So the 0th row is 1.
The 1st row is 1 1.
The 2nd row is 1 2 1. We get the 2 by adding the 1 and 1 above it.
The 3rd row is 1 3 3 1.
The 4th row is 1 4 6 4 1.
The 5th row is 1 5 10 10 5 1
The 6th row is 1 6 15 20 15 6 1.
And so on. In the blanket, you can figure out what number each color represents by looking on the edges.
Here it is again:

You can see that I’ve used white for 1. 2 is blue. 3 is yellow. 5 is red. 7 is purple.
You can’t see the garter stitch rows too clearly in that picture, so here’s a close-up of a section:

If you look at the numbers on the bottom edge, 5 is the solid red diamond. Then 6 is next to it, 3 x 2, yellow and blue. Then comes 7, purple. Then 8, which is 2 x 2 x 2, so it’s three sections of blue. Then going out of the picture will be 9 = 3 x 3, so two sections of yellow.
In the center of the shawl, the cool thing is that every diamond represents the sum of the two diamonds that touch its lower edges. See the red and yellow diamond? That would be 5 x 3 = 15. It is the sum of the two diamonds touching its lower edges, which are 10 = 5 x 2 (red and blue) and 5 (red).
Here’s another detailed view, but this time I’ve written in the numbers:

In that picture, see how each number is the sum of the two diamonds below it?
And see how the factorization works? 70, for example, is 7 x 5 x 2, so the colors are purple, red, and blue. 126 = 7 x 3 x 3 x 2, so the colors are purple, two sets of yellow, and blue.
Okay, there are two very cool patterns that I’ve already noticed from looking at the shawl.
First, whenever you’re on a prime row (with a prime on both ends), ALL of the numbers in that row will have the prime as a factor. See how every number in the 3rd row has some yellow? And every number in the 5th row has some red? And every number in the 7th row has some purple?
The reason for that involves the second way you can build Pascal’s Triangle. The rth number in the nth row is the Combination nCr, the number of ways of forming subsets of size r from a set of size n.
Okay, if I’ve just lost everyone, I’ll use examples. The 3rd number in the 5th row can be calculated as 5x4x3/3x2x1 (= 60/6 = 10). The 2nd number in the 7th row is 7×6/2×1 = 42/2 = 21. The 4th number in the 10th row is 10x9x8x7/4x3x2x1 = 10x3x7 = 210. (You always have r factors in the denominator, starting from r and going down 1 each. We call that r! or r factorial. On top, you also have r factors, but they start with n.)
If n is a prime number, all the numbers in that row of Pascal’s Triangle will have n as a factor, and there’s no way it will cancel out with anything in the denominator (except on the very ends when you have 1).
But all that you will notice in the shawl is the color popping up, and you don’t even have to know why. In fact, I planned the shawl by figuring out the sums, and I’d forgotten about the combinations. So I was delighted when I saw that prime factors consistently show up in all prime rows. And then I remembered why.
The second beautiful pattern is related to the sums. The shawl nicely shows the distributive law. If two diamonds next to each other have a factor the same, the diamond above them which they both touch will have the same factor. That’s because ca + cb = c(a + b).
For example, 21 + 35 = 56
and 7×3 + 7×5 = 7(3 + 5) = 7×8
When you combine those two patterns, we’ve got some inverse triangles. Look at the big picture again:

Now focus on the diamonds with red in them. (Red is 5.)
On the row with 5 on the ends, 1 5 10 10 5 1, every number (except the 1s) has red in it. Well, by the distributive law, every number in the next row that touches two of these will have red in it. Those are the three middle numbers on the next row, 15 20 15. The next row will have red wherever it touches two of those, 35 and 35. And finally, we’ll have red in the diamond that touches those two, 70.
The same inverse triangle is going to happen with 7 and purple.
And today I started knitting the 11th row, using pink for 11. So fun! 🙂
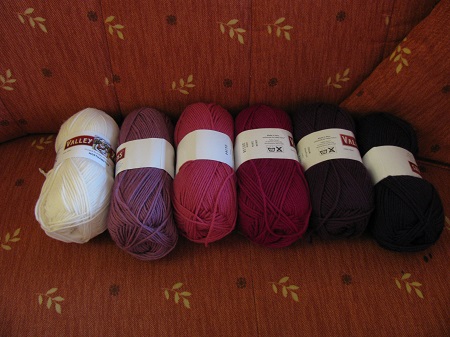
Now, I must admit, I’m not particularly pleased with the overall look. The colors looked better in the blanket with rows of white between them. In the shawl, they’re all mashed together and it’s a little bit much with such bright colors. So when I finish this one, I’m planning to make a new one with more subtle differences. I found a wool yarn, Northampton from yarn.com, that has enough slightly different shades of purple. So I’ll be using these colors.

(I still have one more color on order, because the first one I ordered didn’t really go with these.)
The second shawl won’t be quite as good for explaining Pascal’s Triangle, but I think it will be much prettier! I will have to discipline myself to finish the first one before I start it. (I can solve that, I suppose, by using the same needles.)
So there you have it! Pascal’s Triangle knitted into a shawl! I will definitely post again when I finish it!
My posts on Mathematical Knitting and related topics are now gathered at Sonderknitting.